Introduction:
Are you tired of dealing with a dirty and grimy mechanical keyboard? Removing the keys and giving it a thorough cleaning can make a world of difference. In this guide, I will walk you through the process of how to remove mechanical keyboard keys, cleaning the keyboard, and reassembling it for a fresh and pristine look.
Let’s dive in and get your keyboard looking and feeling like new again.
Gather the necessary tools:
Before we begin, it’s essential to gather the necessary tools for removing the mechanical keyboard keys. Here are the tools you will need:
- Keycap puller: A keycap puller is a small tool designed to safely and easily remove keycaps from a mechanical keyboard without causing damage.
- Flathead screwdriver: A flathead screwdriver can be used to gently pry off stubborn keycaps that may be difficult to remove with a keycap puller.
- Tweezers: Tweezers can be handy for picking up and removing any debris or dust that may be trapped underneath the keycaps.
Remove the keycaps:
Now that we have our tools ready, it’s time to remove the keycaps from the mechanical keyboard. Here are two methods you can use to remove the keycaps:
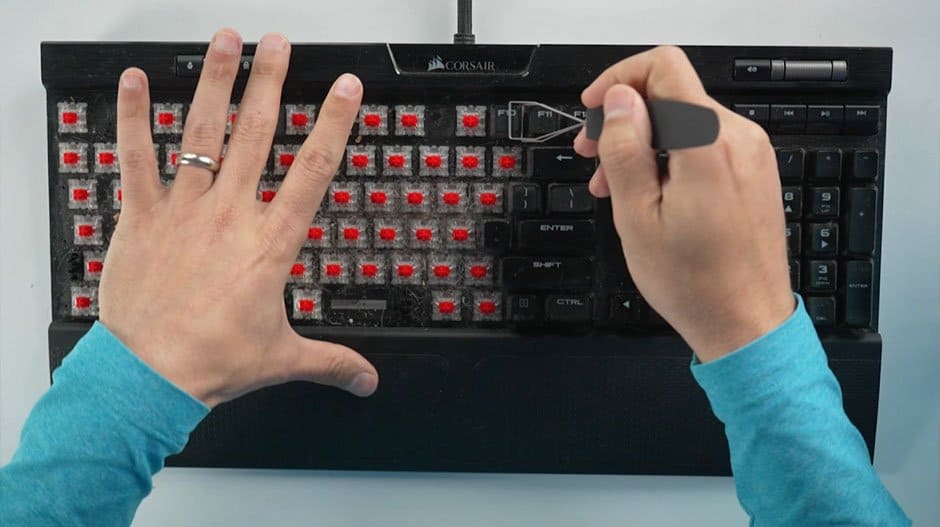
- Use the keycap puller: Start by positioning the keycap puller around the edges of the keycap. Gently wiggle and pull upwards to release the keycap from the switch. Repeat this process for each keycap until they are all removed.
- Use a flathead screwdriver: If you encounter any stubborn keycaps that are difficult to remove with the keycap puller, you can use a flathead screwdriver to carefully pry them off. Be sure to apply gentle pressure to avoid damaging the keycap or the switch.
Clean the keyboard:
With the keycaps removed, it’s time to clean the keyboard and keycaps. Here’s how to do it:
- Remove debris and dust: Use a can of compressed air to blow away any debris and dust that may be trapped underneath the keycaps and around the switches. Be thorough in this step to ensure all the dirt is removed.
- Clean the keycaps: Fill a bowl with warm, soapy water and let the keycaps soak for a few minutes. Use a soft brush to gently scrub away any grime or residue. Rinse the keycaps with clean water and allow them to air dry completely before reassembling the keyboard.
Reassemble the keyboard:
Once the keyboard and keycaps are clean and dry, it’s time to reassemble the keyboard. Carefully place each keycap back onto its respective switch, ensuring they are properly aligned and securely in place. Take your time with this step to avoid any damage to the switches or keycaps.
In conclusion, removing and cleaning the keycaps of a mechanical keyboard is a simple yet effective way to maintain its appearance and functionality. By following the steps outlined in this guide, you can easily remove the keycaps, clean the keyboard, and reassemble it for a like-new look and feel.
So, grab your tools and get ready to give your mechanical keyboard the TLC it deserves.
FAQs
-
Can I remove mechanical keyboard keys without tool?
Simply take a paper clip, unfold it into a straight line, and then make an L shape. Then all you need to do is slide it under a keycap and then lift. The keycap should pop right off. It’s not perfect and may need to be reformed many times before all your keys are pulled, but it’s super simple.
-
How do you remove a mechanical key from a keyboard?
For mechanical keyboards: Pull the keycap out gently from the keyboard using the keycap puller. Use a flathead screwdriver to lift the keycap on larger keys. Nudge any of the curved ends of the attached stabilizer bar outwards. Note: Remove the surrounding keycaps for easier removal and installation.
-
Are mechanical keys removable?
Fortunately, it’s pretty easy to clean a mechanical keyboard, as you can pop off the keycaps and remove those hard-to-reach particles. Since my personal keyboard was long overdue for a deep cleaning, I went ahead and broke down the process with step-by-step instructions.
Originally posted 2023-11-14 08:01:29.

